Install SharePoint 2013 Public Beta on Windows Server 2012 RC – Part IV – Installation of the Prerequisites on Windows Server 2012 RC
With the new version of SharePoint in Public Beta (links). It is time to start with the installation of the prerequisites.
When you do not already have the image of the SharePoint 2013 Public Beta download it. The link for the download can be found in my previous post.
This post will point to the installation of the prerequisites for SharePoint 2013. The prerequisites that we will install is a bit more than the prerequisites that are on the image off the SharePoint 2013 Preview.
Because the machine will be a dev/test machine we will do a lot of research on it so we will also install the following:
- ILSPY: http://wiki.sharpdevelop.net/ILSpy.ashx we will use this to look into some SharePoint dll’s.
- Microsoft Office Professional Plus 2013 Preview: You can download this from MSDN http://msdn.microsoft.com/nl-nl/subscriptions/downloads/default(en-us).aspx.
- Microsoft Office Visio 2013 Preview: You can download this from MSDN http://msdn.microsoft.com/nl-nl/subscriptions/downloads/default(en-us).aspx.
- SharePoint Designer 2013: SharePoint Designer 2013 is the tool of choice for the rapid development of SharePoint applications. http://www.microsoft.com/en-us/download/details.aspx?id=30346
- SharePoint 2013 Technical Library in Compiled Help: Downloadable CHM version of SharePoint 2013 content on TechNet. http://www.microsoft.com/en-us/download/details.aspx?id=30382
- SharePoint Server 2013 Client Components SDK: The SharePoint Server 2013 Client Components SDK can be used to enable remote and local development with SharePoint Server 2013. http://www.microsoft.com/en-us/download/details.aspx?id=30355.
First off we will create a new Admin user called SharePoint Administrator. With this user we will perform the SharePoint installation but we will also use this user to login on the Beta machine.
Open Active Directory Users or Computer by doing the following:
- Go to the Start Menu by using the Windows button or by going to the low left corner with your mouse.
- With the Start Menu open select “Active Directory Users and Computers”.
Open the Users OU and use your other mouse button to add a new user. When you have the “New Object - User” window open create the following user.
| First name | Last name | User Logon name | User logon name |
| SharePoint | Administrator | spadmin | spadmin |
Make sure you select the options:
- User cannot change password.
- Password never expires.
With this user in place search for the domain administrators group and add the current user to that group.
Now logoff the current user and login in with the SharePoint Administrator account to install the prerequisites.
Download ILSPY from the ILSPY website and place the zip file on your virtual machine. Extract the file and place it in a easy location. For easy use I have placed a shortcut on my desktop.
Next up is the Microsoft Office Professional Plus 2013 Preview. If you have downloaded the image add it to the virtual machine. If you do not have the image just skip this step.
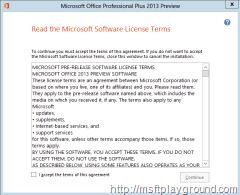
The first step of the Installation is the acceptance off the license terms. Accept the terms and click continue.
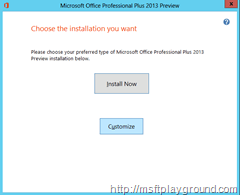
The setup will continue with a step that is know when you have ever installed Office for know we will select “Customize” because I want to check what it will be installing.
In the customize installation window you can see all the component the install will install on you machine. Notice that Microsoft Lync is a new one. Looks like it is now integrated in the Office Suite ![]() .
.
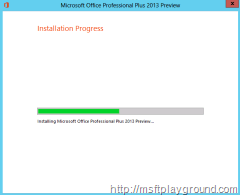
Make sure you do not install the Visio Viewer, this because we will also install the complete version. Select “Install Now” to start the installation.
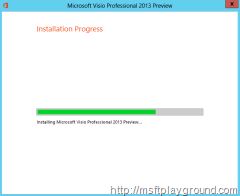
When the installation is done start the installation off the full version of Visio. The Visio installation will also start with the license term screen. Accept the license again and click “Continue” to Continue. This time we will just click “Install Now” to Install Visio.
Next up is the preview release of SharePoint designer double click the exe file to start the installation. This will also start with the “License Terms” screen. Accept the license and click “Continue”. On this installation we will also use the “Install Now” option. With the installation ready it is time to place the documentation on the machine.
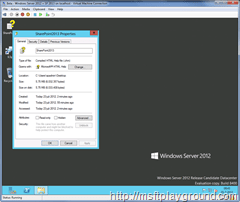
Place the TechNet documentation file (CHM) on your desktop and start the Installation of the Client Components SDK. Don’t forget to “Unblock” the chm file on your desktop or else you will not be able to read the file.
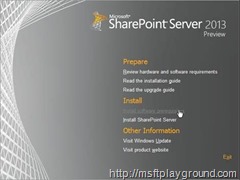
With that all in place we will install the prerequisites of SharePoint. Mount the image on the server to start the installation. The installation will have a splash screen like the one in SharePoint 2010.
Select “Install Software Prerequisites” to start the installation of the Prerequisites.
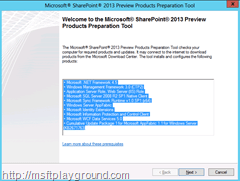
This will start another installer that will install and configure the following components:
- Microsoft .NET Framework 4.5
- Windows Management Framework 3.0 (CTP2)
- Application Server Role, Web Server (IIS) Role
- Microsoft SQL Server 2008 R2 SP1 Native Client
- Microsoft Sync Framework Runtime v1.0 SP1 (x64)
- Windows Server AppFabric
- Microsoft Identity Extensions
- Microsoft Information Protection and Control Client
- Microsoft WCF Data Services 5.0
- Cumulative Update Package 1 for Microsoft AppFabric 1.1 for Windows Server (KB2671763)
Click next to start the installation off these component. I myself are quite happy to see that SharePoint 2013 requires .Net Framework 4.5 ![]()
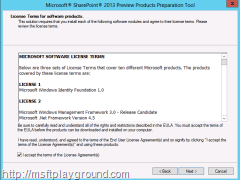
Accept the license terms and click next to continue. This will start the installation of the prerequisites.
With the installation off the prerequisites done it is time to install SharePoint 2013. We will discuss the installation off SharePoint 2013 in the following post.

