Using private repositories for Bicep modules
As of version 0.4.1008 bicep now supports repositories for saving bicep modules. Repositories that are supported at the time of writing this article are:
- Azure Container Registry
- Azure Template Specs
Why should you use repositories
You should use repositories for reusability and modularization. This comes in handy when working with large and complex environment and maybe as well within enterprises with a lot of DevOps team were everyone can use the same modules. By using the repositories, you can easily reuse modules for different deployments and it supports role based access control so you are in control of who has access to the modules.
Personally I'm a big fan of Azure Template Specs and have been using them since the start so I immediately jumped in and tested it out. Modules specified in your Bicep file get downloaded on the bicep build command and included in your final ARM template.
Before you begin make sure you have the correct version of bicep installed on your local machine!
Lets use a Template Spec
Make sure you have a template spec available within Azure. If you are new to Template Specs check a previous blog post of mine:
The new and shiny - Azure Template Specs - Microsoft Playground (msftplayground.com)
With a template spec available we start by creating a bicep configuration file at the root path to make it easy to leverage our repositories. In the configuration file when can specify short aliases to point to the specific repository.
Start by creating a file called 'bicepconfig.json' and use the intellisense of Visual Studio Code to create a 'moduleAliases' section.
{
  "moduleAliases": {
    "ts": {},
    "br": {}
  }
}
The 'ts' abbreviation stands for template spec and 'br' for bicep registry. Add a new alias for 'ts' by creating a sub object with the name of your alias that has the following properties:
- subscription: The subscription were the template specs are saved.
- resourceGroup: The name of the resource group.
"ts": {
          "TemplateSpecs": {
            "subscription": "5b389701-0e47-4738-b4fe-ddb67ac3a036",
            "resourceGroup": "gaag-rg-templates"
          }
}
In your bicep file specify a module like you have always done but make sure to do a specific implementation for the path to the module:
ts/[template spec alias name]:[template spec name]:[template spec version]
An example of a module with a template spec looks like below
module automation 'ts/TemplateSpecs:az-tempspec-automationaccount:0.2' ={
  name: 'automationSpecTempSpec'
  params:{
    automationaccountName: 'azautomationSpec'
    logAnalyticsWorkspaceName: 'azlaworkspaceName'
    location: location
  }
}
When opening a bicep file with a module from a repository the bicep extension tries to download the module to the local cache by using the command bicep restore in the background.
The linter within Visual Studio Code will show if the downloading does not succeed. To be able to download the file you must have access to the template spec.
Restoring / downloading the module from the private repository can also be done manually, by running the following command:
build restore [bicep file]
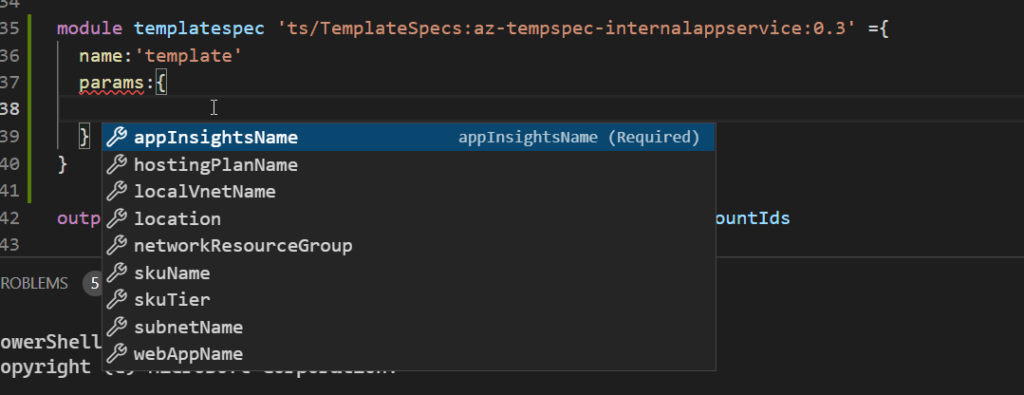
When the file is downloaded to the local cache you will have intellisense within Visual Studio Code helping you configure the module.
Azure Container Registry
Like mentioned above the second option for saving and sharing modules is a Azure Container Registry. Once you have a Azure Container Registry it is very easy to start saving your modules.
First we need to get a module within the Azure Container registry and this is were the new command 'publish' comes in. For this command you need to specify the source file and the target path within the container registry.
bicep publish .\.modules\004-vnet.bicep --target br:azcrbicepregistry.azurecr.io/bicep/modules/vnet:1.0
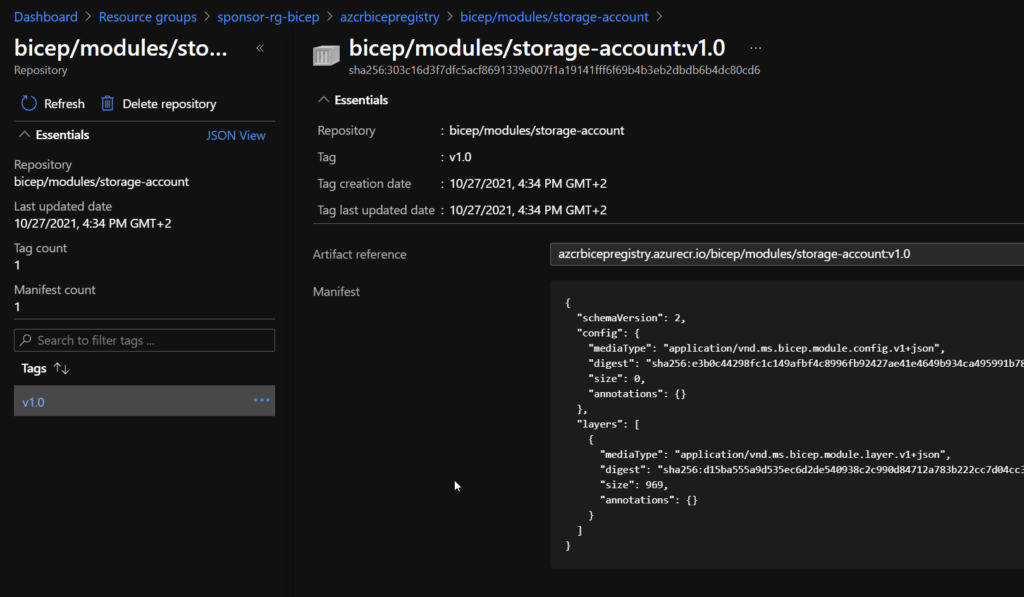
Executing the command uploads the module to the registry.
For the bicep repository we will also make an alias as this makes it very ease to reference the container registry.
Add a new alias within 'br' by creating a new object with the name of your alias that has the following property:
- registry: The URL of the container registry.
  "br": {
      "SponsorRegistry": {
        "registry": "azcrbicepregistry.azurecr.io"
      }
    }
In your bicep file register a module like you have always done but make sure and now use the specific implementation for a bicep repository:
br/[repositry alias name] or [registry url]:[path to the module]:[version]
An example of a module with a bicep repository looks more or less the same as a regular one.
module storageExternal 'br/SponsorRegistry:bicep/modules/storage-account:v1.0' ={
  name: 'storageAccountExternal'
  params:{
    accountName:'azstrbiceptestingexternal'
    location:location
  }
}
Downloading the module works the same as with the template specs repository.
Good to know
Like always there are a few things to be aware of:
- Role based access applies to both repositories. This means when publishing modules to a registry or template spec you must have permissions. For the container registry you must have permissions to push an image. To be able to deploy a module from a Template spec you must have read permissions and for a container registry you must have permissions to pull an image.
- The bicep command uses credentials on the background from the Azure CLI or Azure PowerShell. There are situations were it is needed to make sure which credentials are used. This is configured in the bicepconfig.json. Sample for this is show in the following snippet.
  "cloud": {
    "currentProfile": "AzureCloud",
    "credentialPrecedence": [
      "AzureCLI",
      "AzurePowerShell"
    ]
  }
Comments