Azure Function CI – 1. Creating a Pre-Compiled Azure Function
As mentioned in the overview Azure Function provide event-based serverless computing that make it easy to develop and scale your application, paying only for the resources your code consumes during execution. Since a couple of months Visual Studio contains a preview with the ability to create a function project in Visual Studio, add functions using any supported language, run them locally, and publish them to Azure. But this project template does not make it completely possible to use the template with a CI scenario.
Especially running the Azure Function locally offers a great functionality and gives you the option to debug the function before publishing it to Azure.
Prerequisites
This blog post is totally written using the Azure Function Visual Studio template. Information and the Azure Function tools download are listed below:
Getting Started
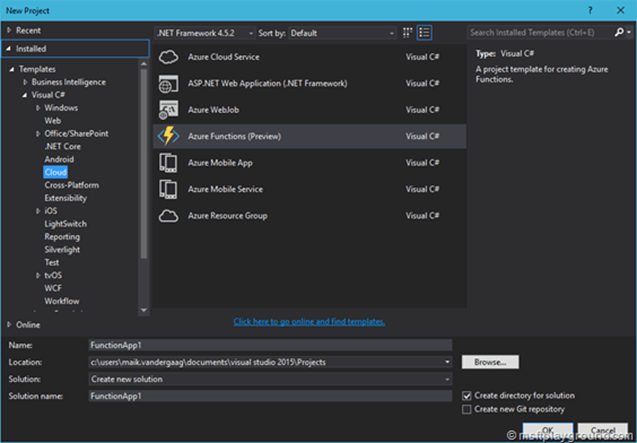
When you have the Azure Function tools installed we can start creating a new project with Visual Studio. For this project make use of the “Azure Function (Preview)” template that is added when you have the Azure Function Tools installed.
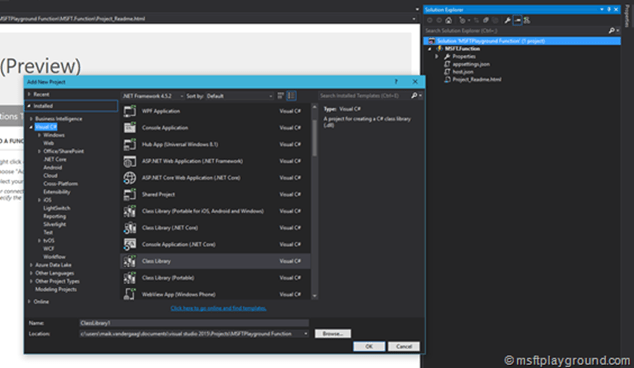
Give the project a appropriate name and also do this for your solution. Click “Ok”to create the project and solution. When the solution is created right click on the solution and add a new project. This time add a project of the “Class Library” template. We will use this project for the pre-compiled function.
If the project is created rename the “Class1” file to “MsftHttpTrigger” and also rename the class itself.
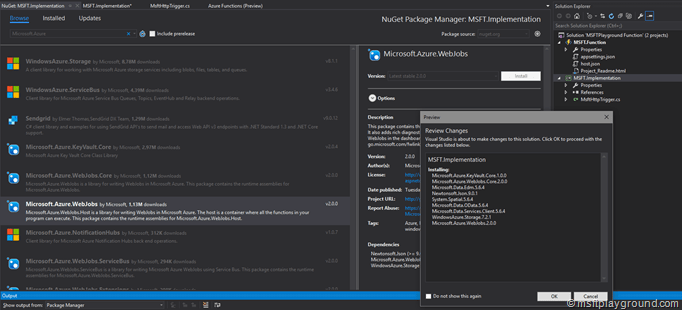
Next step is to add the required NuGet packages in order to run the function itself, add the following NuGet Packages to the class library project:
- “Microsoft.Azure.WebJobs”
- “Microsoft.AspNet.WebApi.Client”
- “Microsoft.AspNet.WebApi.Core”
For this example we will use the default “Run” method you normally get within the “run.csx” copy and past it within the MsftHttpTrigger class.
using Microsoft.Azure.WebJobs.Host;
using System.Linq;
using System.Net;
using System.Net.Http;
using System.Threading.Tasks;

namespace Implementation {
    public class MsftHttpTrigger
    {
        public static async Task<HttpResponseMessage> Run(HttpRequestMessage req, TraceWriter log) {
            log.Info($"C# HTTP trigger function processed a request. RequestUri={req.RequestUri}");

            string name = req.GetQueryNameValuePairs()
                .FirstOrDefault(q => string.Compare(q.Key, "name", true) == 0)
                .Value;

            dynamic data = await req.Content.ReadAsAsync<object>();
            name = name ?? data?.name;

            return name == null ? req.CreateResponse(HttpStatusCode.BadRequest, "Please pass a name on the query string or in the request body"): req.CreateResponse(HttpStatusCode.OK, "Hello " + name);
        }
    }
}
Function Project
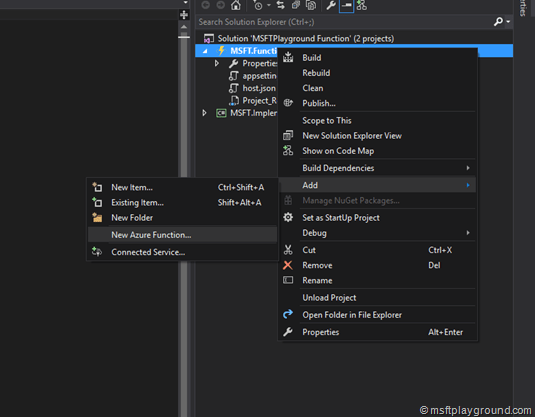
With the pre-compiled function ready the adjustments can be made to the Azure Functions project. We need to start by adding a new function to the function project by right clicking on the project and selecting “Add” – “New Azure Function”.
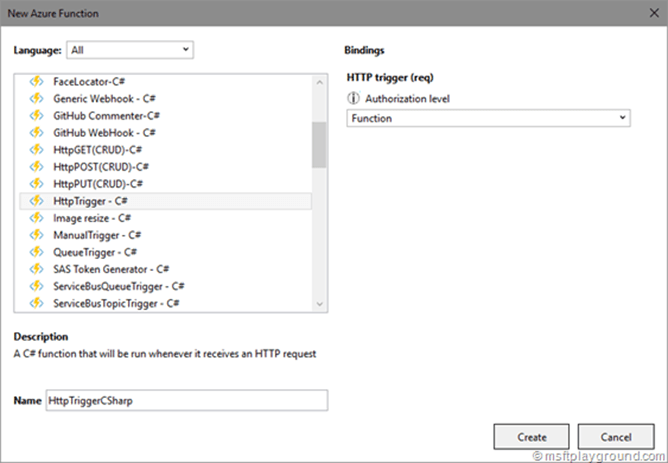
This option will open a dialog with a lot off different Azure Function options. Within this example we will use a HttpTrigger – C# function.
After clicking “Create” the function will be created and we can delete the files we don’t need. The files that can be deleted are:
- “sample.dat”
- “run.csx”
- “readme.md”
The other file within the function (function.json) needs to be changed to refer and load the pre-compiled function. This can be done by adding a “scriptfile” property and “entrypoint” that refers to the method within the “scriptfile”.
{
  "disabled": false,
  "scriptFile": "bin\\Implementation.dll",
  "entryPoint": "Implementation.MsftHttpTrigger.Run",
  "bindings": [
    {
      "authLevel": "function",
      "name": "req",
      "type": "httpTrigger",
      "direction": "in"
    },
    {
      "name": "res",
      "type": "http",
      "direction": "out"
    }
  ]
}
As specified in the code snip-it above the “scriptfile” (binary) is looked within the bin folder of the function.
Copy DLL
As specified within the function.json file the pre-compiled function resides within the “bin” folder of the function. This means we will need to populate the bin folder with the dll of the class library project. In order to get the binary file in place we will make use of the build events that can be specified in a project.
Right click the project and select properties. Open the build events and add a post build event to copy the output to the functions bin folder.
SET FILEPATH=$(SolutionDir)MSFT.Function\MsftHttpTrigger\bin

IF NOT EXIST "%FILEPATH%" (
        GOTO MakeDir
) ELSE (
       GOTO CopyFiles
)

:MakeDir
mkdir "%FILEPATH%"
:CopyFiles

