Installing Azure Stack on a laptop with Windows 10
Since the Azure Stack public preview has been released I had the idea of trying to install it on my corporate laptop. My corporate laptop has the following hardware specs:
- Core I7
- 32 GB Memory
- C Drive: 150 GB SSD
- D Drive: 500 GB SSD
Since Microsoft released the minimal system requirements that are a lot higher (https://azure.microsoft.com/en-us/documentation/articles/azure-stack-deploy/) I saw this as a real challenge. The first time I tried it failed miserably but the second time was a great success.
Download Azure Stack POC items
First step is to download the Microsoft Azure Stack Technical Preview files from the Microsoft site:
Create Virtual Machine
After I downloaded all the files the files for the Technical Preview I created a new VM within Hyper-V based on the virtual hard drive “WindowsServer2016Datacenter.vhdx” that was in the set of you downloaded.
The Virtual Machine was configured with the following specs:
- 27 GB Ram
- 6 Cores
- One network adapter with Internet Access
- 3 Additional Data drives dynamically expanding.
What already might come to mind is the following: Can I use Hyper-V within a Hyper VM machine (Nested Virtualization). The answer is “Yes” if you are running Insider builds of for example Windows 10. In the insider builds there is a early preview feature called Nested Virtualization. It is available if you are running Build 10565 or later, and comes with no performance or stability guarantees.
This article on MSDN explains how you can setup nested virtualization:
I performed the following PowerShell script from my client machine with the VM running.
Invoke-WebRequest https://raw.githubusercontent.com/Microsoft/Virtualization-Documentation/master/hyperv-tools/Nested/Enable-NestedVm.ps1 -OutFile ~/Enable-NestedVm.ps1

~/Enable-NestedVm.ps1 -VmName "Windows 2016 TP 4 - Azure Stack Host"


Invoke-Command -VMName "Windows 2016 TP 4 - Azure Stack Host" -ScriptBlock { Enable-WindowsOptionalFeature -FeatureName Microsoft-Hyper-V -Online; Restart-Computer }
The following screenshot shows the output from these commands:
Note: When using Nested Virtualization you can not use dynamic memory.
Adjust Setup Files of Azure Stack
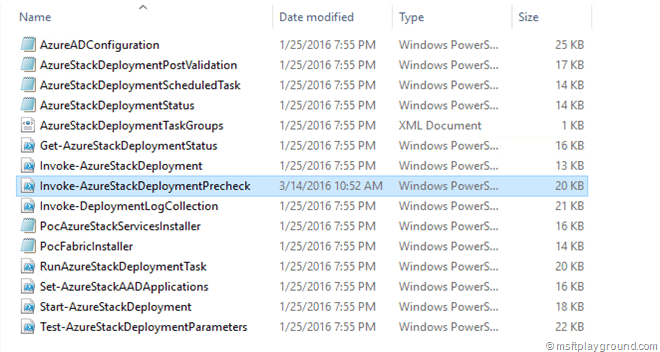
In order to install Azure Stack on minimal hardware some setup files need to be adjusted. In order to make these adjustments Mount the virtual drive called: “MicrosoftAzureStackPOC.vhdx”.
On this drive the prerequisites check needs to be changed. The prerequisites checks the amount of memory in the PC. The amount can not be less then 64 GB. If you do not change the PowerShell file and you do not have sufficient amount of memory you will encounter the following error.
"Check system memory requirement failed. At least 64GB physical memory is required."
In order to skip or pass this step the PowerShell that executes the prerequisites needs to be adjusted.
“Invoke-AzureStackDeploymentPrecheck.ps1”
In the file look for the line:
if ($totalMemoryInGB -lt 64) {
    throw "Check system memory requirement failed. At least 64GB physical memory is required."
}
Change it to the minimum amount of memory your machine will use. This is not the only change you need to make when you want to run Azure Stack on minimal memory. The Azure Service Fabric installer will configure a couple (10) of machines with a specific amount of memory. Running all these machines together will not work on the amount of memory so the configuration needs to be changed.
The configuration for these machines can be adjusted within a file called “PoCFabricSettings.xml” that you can find in the folder “Drive:\AzureStackInstaller\PoCFabricInstaller”.
Every VM that will be created during the installation has a configuration element in this file. In order to get it running on my Hardware I needed to adjust the some elements for all machines to the values below.
<ProcessorCount>1</ProcessorCount>
<RAM>1</RAM>
<MinRAM>1</MinRAM>
<MaxRAM>2</MaxRAM>
Installation of Azure Stack
When the setup files are adjusted the drive can be unmounted and all files from the bits can be copied to the newly created VM.
When you login to the VM you need to run a PowerShell window as Administrator and start the “DeployAzureStack.ps1” file for the installation. I suggest running the script with the verbose parameter to get some more information during the installation.
.\DeployAzureStack.ps1 -verbose
If something looks strange or something went wrong during the installation you can check the log files. The log files are located in the following ProgramData folder.
- C:\ProgramData\Microsoft\AzureStack\Logs
After the prerequisites are passed the installation will continue and ask you to login in to a Azure Active Directory tenant. When the login is successful and you confirm you want to attach Azure Stack to this Azure Active Directory the installation of the Azure Stack POC will begin.
When the installation is done is will show the below message. On my VM the installation took about 4 hours.
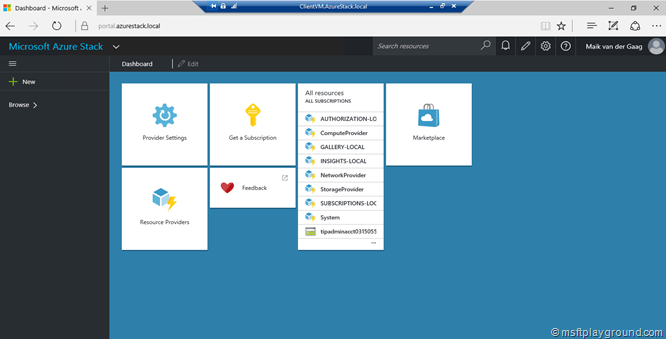
Opening the Client VM and the Azure Stack Portal link will lead to the following URL: https://portal.azurestack.local/ with your own Azure Portal.
The base installation of Azure Stack can be extend with the PaaS (Platform as a Service) bits. The installation files and manuals can be found here:
Other useful links for setting up a Azure Stack Environment are:


