Microsoft Defender for DevOps
During Ignite 2022, Microsoft released Microsoft Defender for DevOps. With Microsoft Defender for DevOps, you can discover, monitor, and detect threats in your source code management systems and
source code.
A connection to the source management system is required to get these insights. With this connection, you allow Defender for Cloud to discover the resources in, for example, your Azure DevOps organization or your GitHub Repositories.
Connecting Azure DevOps
In the following steps, we will go over the procedure to connect Defender for DevOps to your Azure DevOps organization:
- Log in to the Azure Portal and go to "Defender for Cloud."
- In the left menu, select "Environment Settings."
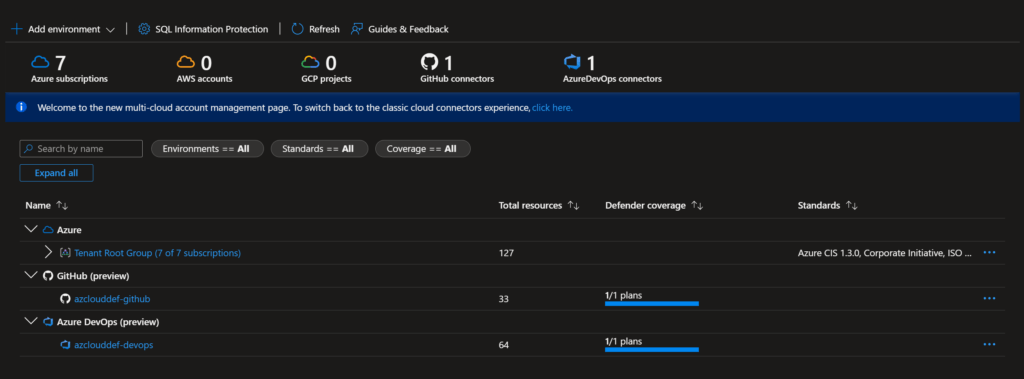
- In the Environment Settings blade, click on "Add environment" and "Azure DevOps."
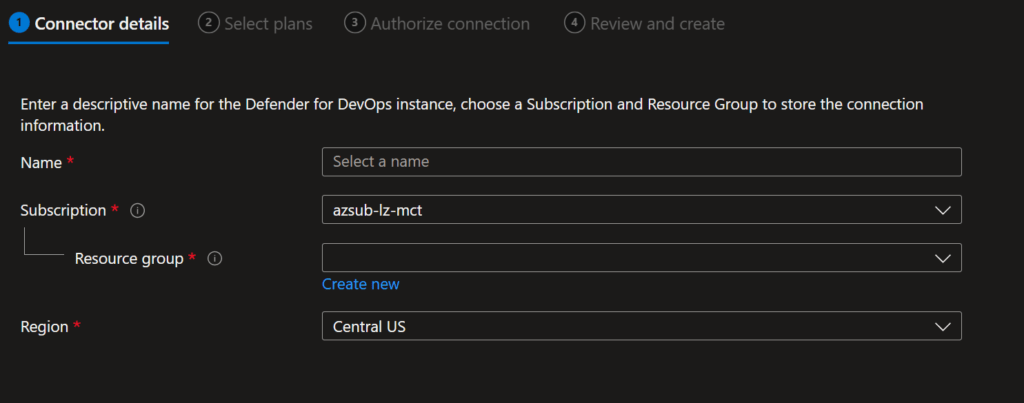
- Defender for Cloud needs a resource created in Azure for the connection to work. That is why the connection steps ask you for a resource group and a name. Fill in a name and select or create a resource group.
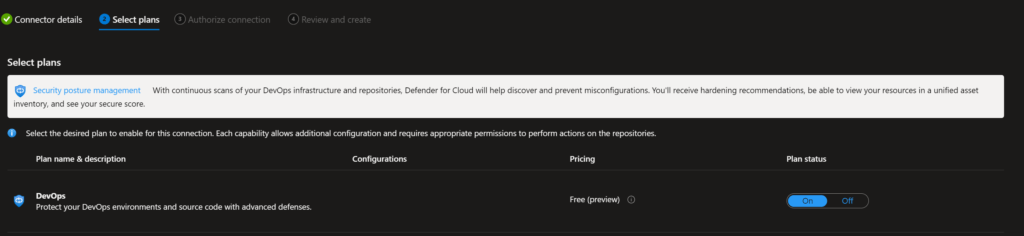
- In the next step, select the right plan. For now, there is just one option called "DevOps."
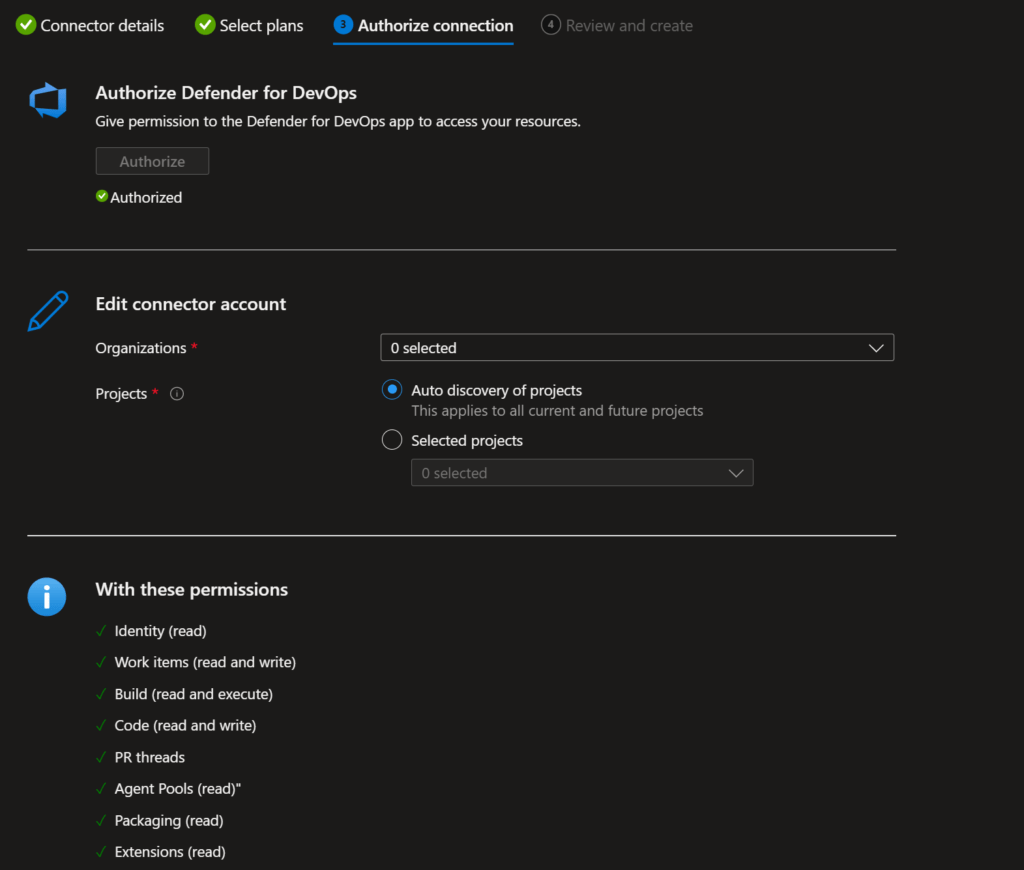
- When the plan is selected, the authorization to Azure DevOps can be configured. Log in to your account for Azure DevOps and select the organization and projects for which you need to configure Defender for DevOps.
- The last step is to create the connection. Click on create and wait until the link is deployed and configured.
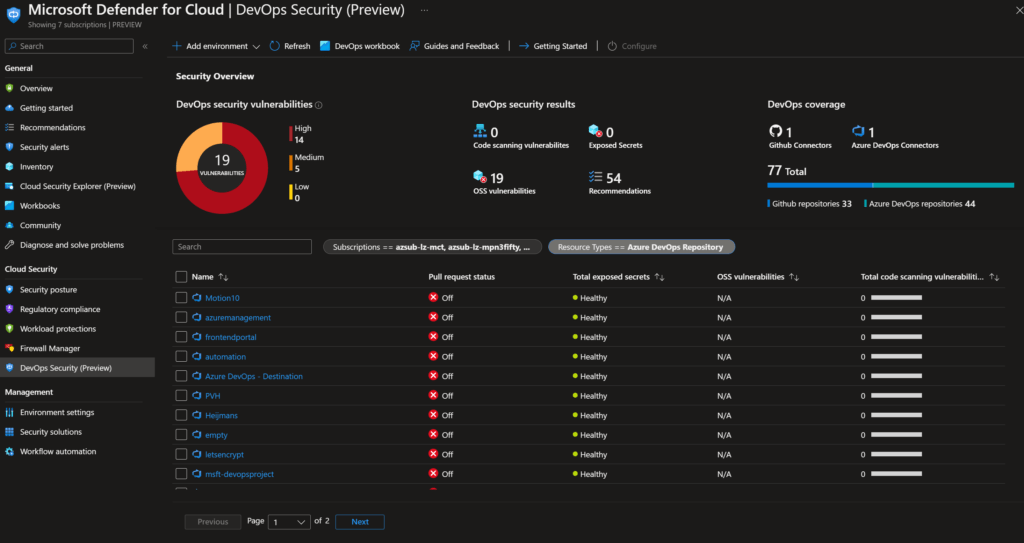
After a while will start to pop up in Defender for DevOps. With this, you will be able to mitigate vulnerabilities in Azure DevOps.
Connecting GitHub
Connecting GitHub is almost the same as connecting Azure DevOps except for the connection and authorization. Let's discover this by following the below steps:
- Start from "Defender for Cloud."
- In the left menu, select "Environment Settings."
- On the "Add Environment" step, select "GitHub."
- The connection details and plans blade are identical to the Azure DevOps connection. Fill in the correct info and proceed to the Authorization blade.
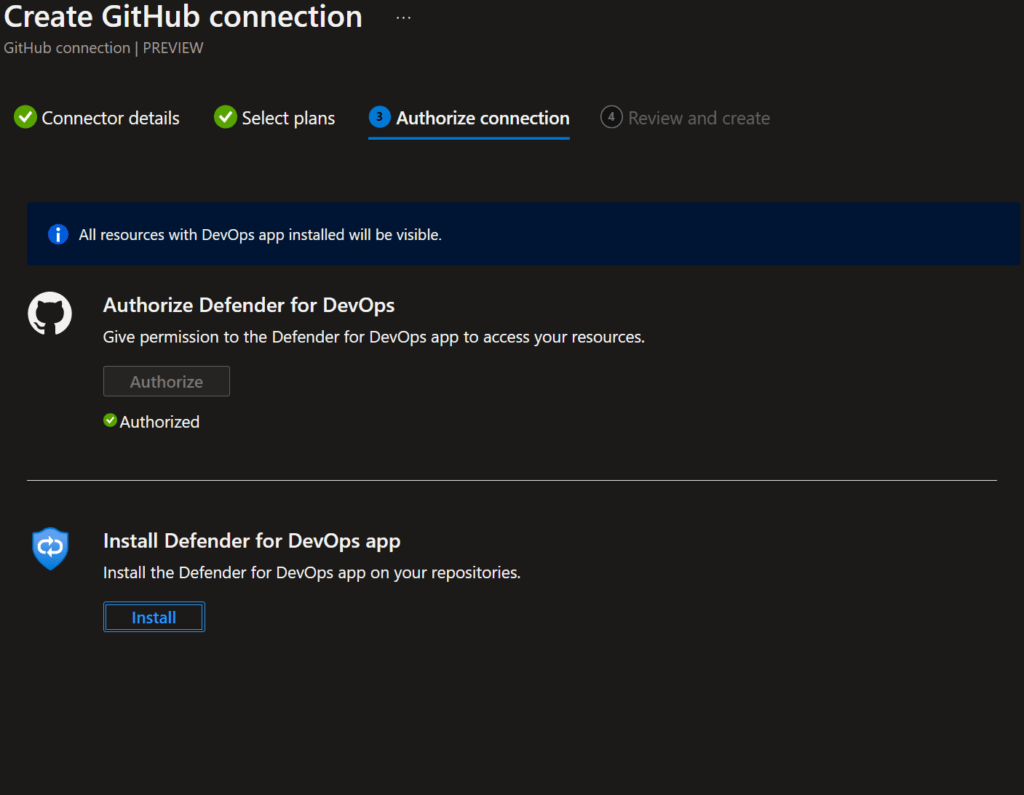
- In the "Authorize connection" blade, authorize the connection in two steps. The first step is to supply the credentials and the second step is to install the Defender for DevOps app on the repositories of your choice.
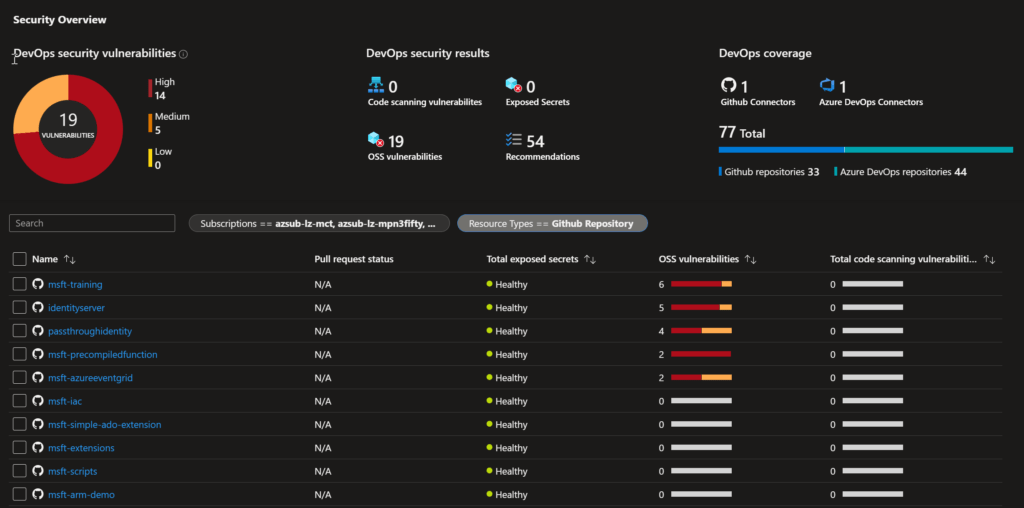
Just as with the DevOps connection for Azure DevOps, it will take a while before the information is displayed in the Defender for DevOps tab.
Azure Resources
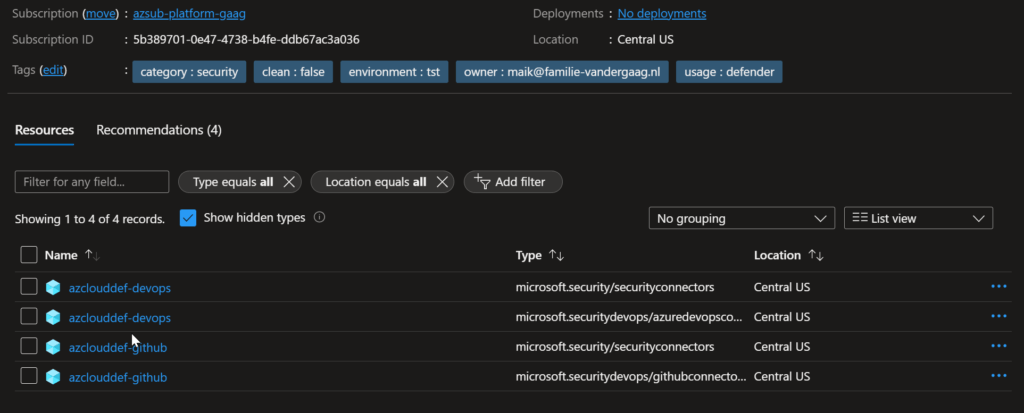
You can check the resource group for the created resources/connections if interested. To see the resources check the box "Show hidden types" to make the connections visible.
Information
If you want to learn more about Microsoft Defender for Cloud or especially Defender for DevOps, check out the following resources: