
Verified commits in GitHub
Git commits can be signed by using a GPG key. With this GPG key, you can prove that a specific commit comes from you. Doing this will also add a ‘Verified’ badge next to your commit.

By signing your commit, you prove that the commit came from you, as it is straightforward to add anyone as an author by adding the ‘–author’ flag. By following the steps below, we will ensure we sign our commitments. After setting up git commit signing in GitHub, we will also look into setting up git configuration files for different folders. It will help you use different configurations like other user names for your commit, such as automatic commit signing in GitHub.
Creating a GPG key
To get started, we need to create a GPG key. For this, we can use the command line tool called GnuPG. Install this command line and run a new terminal.
Within the terminal, use the following command to generate a new key.
gpg --full-generate-key
Choose option 4 (RSA Only) and pick the keysize 4096, then fill in the rest of the questions based on your requirements, and fill in a passphrase at the end.
Adding the key to GitHub
Now that we have a key on our working station, it needs to be exported and added to GitHub to verify your commits. Go back to your terminal and perform the following command.
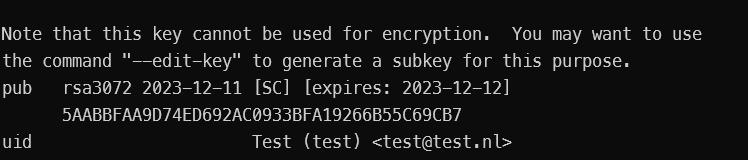
gpg --list-secret-keys --keyid-format=long
This command retrieves the secret keys where we will need the info behind the ‘/.’ For example, with the key ‘rsa3072/FA19266B55C69CB7’, we need this part ‘FA19266B55C69CB7’; the secret can be exported. We will refer to this part as the secret ID and need it later in this post.
gpg --armor --export FA19266B55C69CB7
Copy the key that is exported, beginning with —–BEGIN PGP PUBLIC KEY BLOCK—– and ending with —–END PGP PUBLIC KEY BLOCK—–.
Open up your GitHub Settings page and choose the option ‘SSH and GPG Keys’

Next to the GPG Keys header, click ‘New GPG Key’ and fill in the correct information. The copied GPG key must be passed into the ‘Key’ field. Then click the add GPG key button to add it.
Configuring your local device
Now that we have the Key generated and added to GitHub, we can make sure that Git is also aware of the keys and will sign the commits. We will configure git in a way that it will automatically sign our commits with the key we created. I am also an Azure DevOps user, and as mentioned in the introduction, I also use a lot of other environments with other email addresses; for this, we want to make a configuration so that we do not always sign the commits or have to add our passphrase. We will configure git to use specific configurations based on our work folder. Let’s start by opening the global git config file; this file is located in: ‘C:\Users[username]gitconfig.’ In this file, we remove any user-specific references and add conditions:
[filter "lfs"]
	process = git-lfs filter-process
	required = true
	clean = git-lfs clean -- %f
	smudge = git-lfs smudge -- %f

[includeIf "gitdir:D:/src/github/"]
  path = C:/Users/MaikvanderGaag/.github/.gitconfig-personal
[includeIf "gitdir:D:/src/3fifty/"]
  path = C:/Users/MaikvanderGaag/.github/.gitconfig-work
[includeIf "gitdir:D:/src/x/"]
  path = C:/Users/MaikvanderGaag/.github/.gitconfig-x
After the changes, the file will look like the one above. As you can see, we included specific git configuration files based on the main folder. This was, for me, a handy situation as I always make separate folders per organization. A specific config file then looks like this.
.gitconfig-work
[user]
	name = Maik van der Gaag
	email = mail@corporate.eu
.gitconfig-personal
[user]
	name = Maik van der Gaag
	email = maik@personal.nl
	signingkey = FA19266B55C69CB7

[commit]
	gpgSign = true
[tag]
	gpgSign = true
In the ‘.gitconfig-personal’ file, you can also see that for my user, I use a signing key that references the secret ID. By setting commit.gpgSign and tag.gpgSign tags and commits are automatically signed. The handy thing with this configuration is that base configurations can be done in ‘.gitconfig’, and any other specific configurations can be done in separate files.
Just configure GPG signing in the global .gitconfig file
You can run the following commands if you want to configure it in the global ‘.gitconfig’ file.
git config --global user.signingkey FA19266B55C69CB7
git config --global commit.gpgsign true
git config --global tag.gpgsign true
Common Issues and Testing
Testing Git config
When using multiple folders for your configuration, it is sometimes handy to test if the configurations are set correctly. You can check this with the following command.
git config -l
Unable to find key when doing a commit.
One of the common issues that I came around was that git wasn’t able to find my keys. For this, we added a part in the configuration.
[gpg]
	program = C:\\Program Files (x86)\\GnuPG\\bin\\gpg.exe
This can also be added by a shell command.
git config --global gpg.program 'C:\\Program Files (x86)\\GnuPG\\bin\\gpg.exe'