
“Exposing Azure App Registrations as Secure APIs: A Guide to Authentication with ‘User Assignments Required’ Turned On”
Azure App Registrations are a powerful tool for managing resource access and integrating applications with Microsoft's cloud services. While these registrations are typically used to grant applications access to other Azure resources, they can also be exposed as APIs, allowing external applications to interact with the registered application's resources securely.
In this blog post, we'll explore exposing an Azure App Registration as an API, including the necessary configuration to authenticate towards the application when the application is configured with 'User Assignments Required' turned on. This short guide tells you how to configure this.
This guide talks about two different Application Registrations.
- The application you are authenticating to. (This is the application registered on, for example, an Azure App Service)
- The application you are authenticating with. (This is the application you will use to retrieve data from, for example, an API)
Step 1: Expose an API
Ensure the application you are authenticating to (1) has an Application ID Url configured within the App Registration blade of the application.
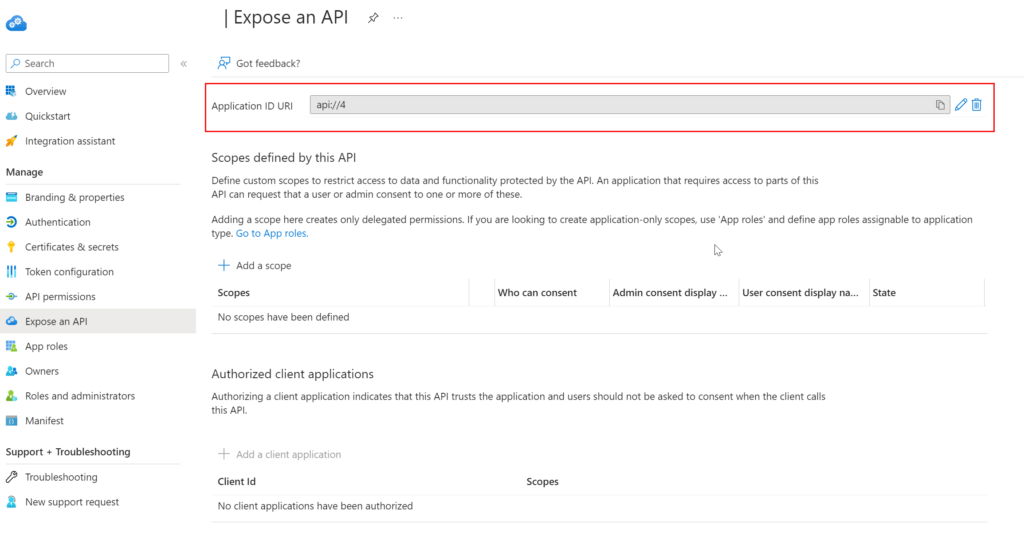
If this is not configured, make sure to add it.
Step 2: Create an App Role
An 'App Role' needs to be defined to authenticate your application. For this, go to the 'App Role' blade for the App Registration you are authenticating to (1).
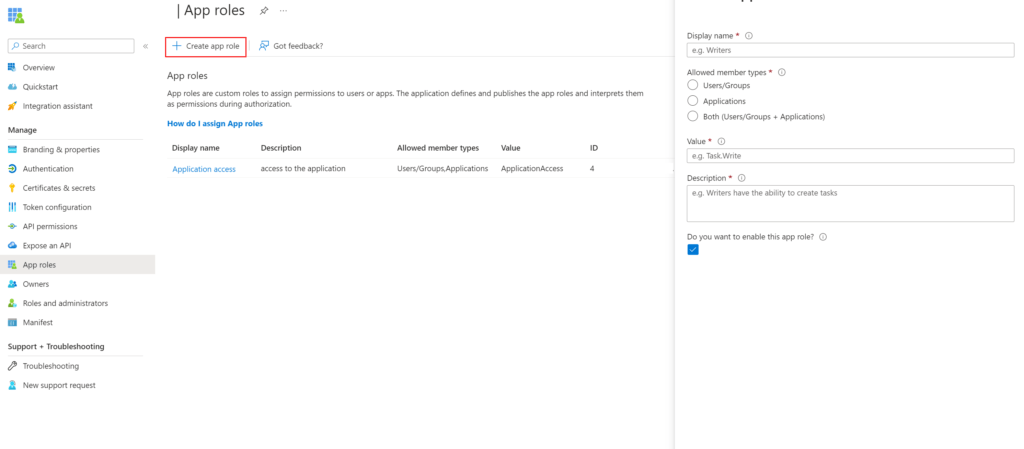
If an App Role does not exist, create a new one and fill in the required properties. Make sure also to select Applications in the allowed "member types" and enable it. Adding these roles makes sure that the roles are added to the token of the application.
| Field | Description | Example |
| Display Name | Display the name for the app role that appears in the admin consent and app assignment experiences. This value may contain spaces. | Survey Writer |
| Allowed member types | Specifies whether this app role can be assigned to users, applications, or both. | Users/Groups |
| Value | Specifying the roles' value claim that the application should expect in the token. The value should match the string referenced in the application's code, which can't contain spaces. | Survey. Create |
| Description | A more detailed description of the app role displayed during admin app assignment and consent experiences. | Writers can create surveys. |
| Do you want to enable this app role? | Specifies whether the app role is enabled. To delete an app role, deselect this checkbox and apply the change before attempting the delete operation. | Checked |
Step 3: Add application API Permission
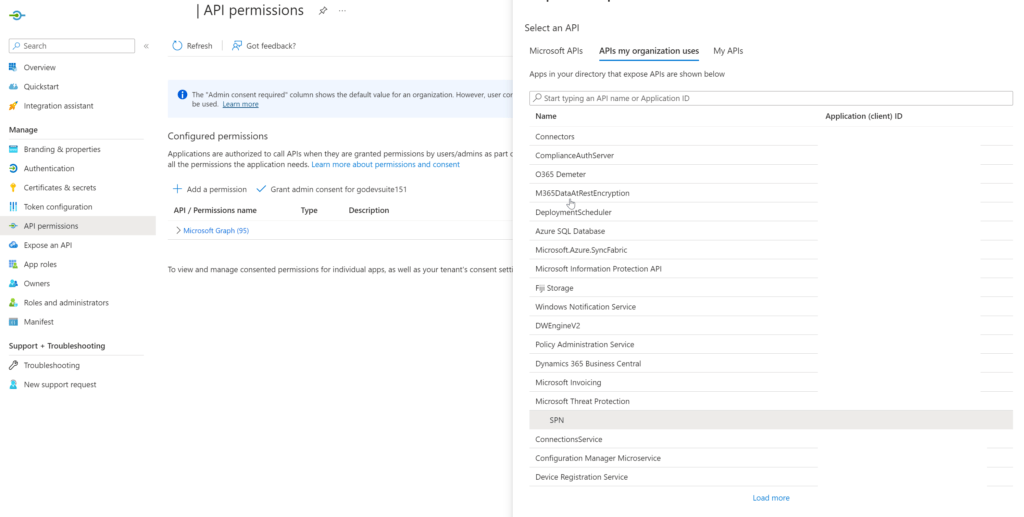
On the 'API Permission' blade of the application you are authenticating with (2), the required permissions for the application need to be configured. In the blade, click 'Add permission.'
Then go to the tab "APIs" my organization uses and search for your App Registration. You should be able to see the name within the list.
Click on the application. On the next screen, you should be able to see the roles that you can choose. Select the permissions that are required and click on "Add Permissions."
Step 4: Admin Consent
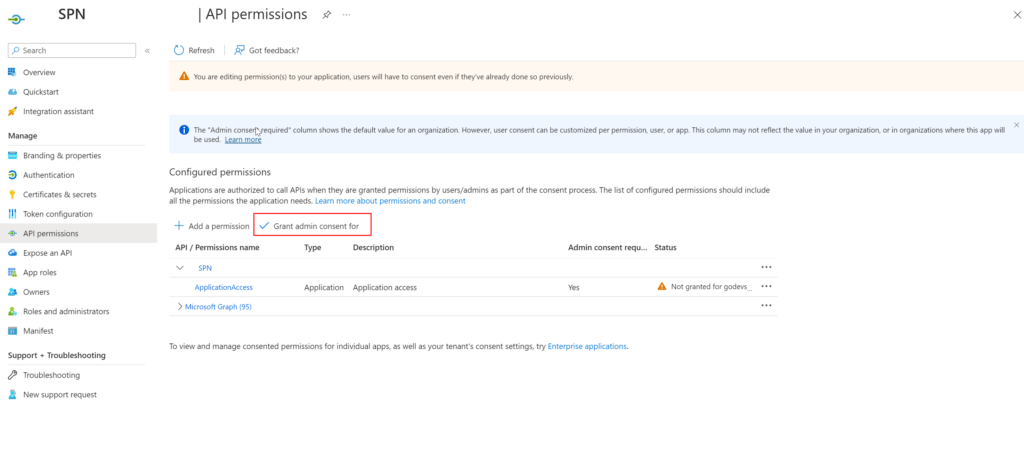
These types of app roles require an 'Admin Consent.' After adding the permission, you will be returned to the API permissions blade. In this blade, click on 'Grant admin consent for.'
Comments