Local Kubernetes cluster with Dashboard
When developing containers or applications that need to be hosted on Kubernetes it is handy to have a local Kubernetes cluster.
With the use of Docker you can easily create a local single node cluster.
Docker
Start by installing Docker for your operating system. In this guide I used Docker for Windows but the operating system does not really matter.
Follow the setup guide and Docker will be started after the install.
Adding Kubernetes
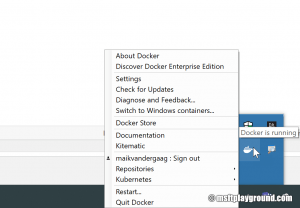
When Docker is running you will see a Docker icon in the taskbar. Add Kubernetes can be via the settings page of Docker. To open the settings right click the icon and choose settings.
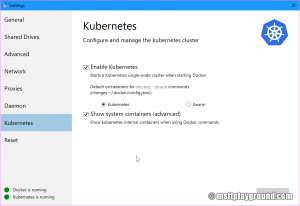
In the settings there is a sub menu called "Kubernetes" on this page enable Kubernetes. If you want you can make the system containers visible.
Applying these settings will add Kubernetes within Docker.
Kubernetes Dashboard
Adding Kubernetes to Docker will not add the Kubernetes Dashboard. For adding the Kubernetes dashboard you have to do some additional steps.
- Install kubectl: Install and Set Up kubectl.
- Open a Command Prompt.
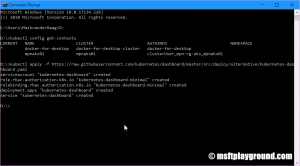
If you have more Kubernetes cluster make sure you are running within the right Kubernetes context. You can get your current context via:
kubectl config get-contextsand set the right context via:kubectl config use-context [context-name]
- Run the following kubectl command to add the dashboard to the cluster.
kubectl apply -f https://raw.githubusercontent.com/kubernetes/dashboard/master/src/deploy/alternative/kubernetes-
dashboard.yaml
As this is a development environment I used the alternative setup. The alternative setup is not secured and should not be used in production scenario's. Kubernetes dashboard installation
- To open the dashboard use the proxy option of kubectl.
kubectl proxy
This will open a proxy to the dashboard. You can open the dashboard in the browser via the link.
- http://localhost:8001/api/v1/namespaces/kube-system/services/http:kubernetes-dashboard:/proxy/
When you want to use the dashboard the proxy needs to be open by running the same kubectl proxy command.
Permanently exposing the dashboard
You can also expose the dashboard permanently by adding a service to the cluster. Applying the below "yaml" file will add the service to the cluster.
apiVersion: v1
kind: Service
metadata:
  labels:
    k8s-app: kubernetes-dashboard
  name: kubernetes-dashboard-nodeport
  namespace: kube-system
spec:
  ports:
  - port: 80
    protocol: TCP
    targetPort: 9090
    nodePort: 30555
  selector:
    k8s-app: kubernetes-dashboard
  sessionAffinity: None
  type: NodePort
The service will expose the dashboard on port 30555. After applying you can open dashboard via this url: http://localhost:30555.
Reset Kubernetes
When testing and developing applications you sometimes want to reset the cluster in order to begin with a clean environment.
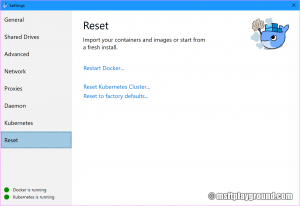
Docker has a handy option for resetting the cluster. Within the settings open the "Reset" option and click on "Reset Kubernetes cluster".
If you choose to reset the Kubernetes cluster remember that you will remove the dashboard aswell.


