Azure Function CI – 3. Deploying the Azure Function from the Build within VSTS
This post is the third and last one in a series of posts and will help you by deploying a CI build for a Azure Function.
Prerequisites
This blog post is totally written using the Azure Function Visual Studio template. Information and the Azure Function tools download are listed below:
- Finished Part 2 - Create a CI Build for the Azure Function
- Azure Function Tools
- Information
- Visual Studio Team Services
In order to also make it deployable we need to take some steps.
Project changes
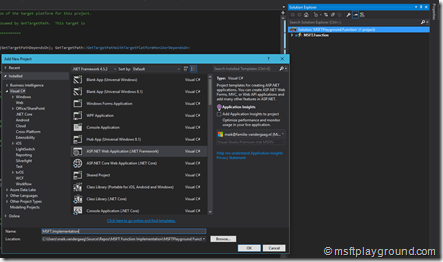
With all parts in place we can take the last steps to deploy the function. As there are still some small issues with the Preview Azure Function Tools for Visual Studio we need to use a ASP.Net Web Application project to create the deployment package. Right click the solution to add the new project of the type ASP.Net Web Application.
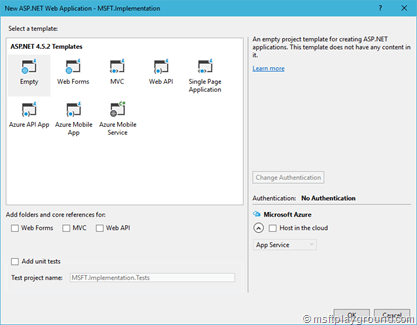
In the next screen click the empty ASP.Net Web Application template because we do not need all the extra features that are included in the other templates.
As mentioned above the project will be used to build a deployment package for the function. In order to get all files in place within the project we will configure a Pre Build event by opening the properties of the newly created project.
SET SOURCEPATH=$(SolutionDir)MSFT.Function\MsftHttpTrigger
SET FILEPATH=$(ProjectDir)MsftHttpTrigger

IF NOT EXIST "%FILEPATH%" (
GOTO MakeDir
) ELSE (
GOTO CopyFiles
)

:MakeDir
mkdir "%FILEPATH%"
:CopyFiles
xcopy /e /y "%SOURCEPATH%" "%FILEPATH%"
Now build the project, this will make sure all files are retrieved and placed within the project folder structure. When the build succeeds include the files within the project except the “project.json” and “project.lock.json”. By including the files within the project we make sure the files can be packaged by “msbuild”. In the functions folder also include a dummy “run.csx” file in order to use the precompiled function within the Azure Portal. Last step for now is to delete the “web.config” file.
The solution now looks as followed:
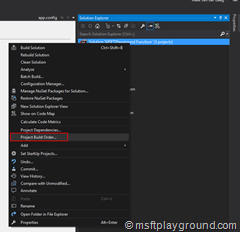
Now check / change the build order of the solution to make sure everything is build in the appropriate order to have the latest files in place within the deployment project. Right click the solution and click on “Project Build Order”.
Make sure the projects are build in the following sequence:
- Azure Function Project
- Implementation Project
- Deployment Project
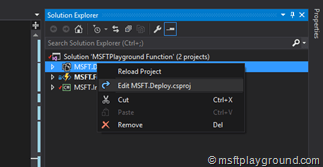
When we would package the project at this time we would get a correct package but would also have some files we do not want to include in our package. This is the package.config file and the default “bin” folder of a web project. In order to exclude them unload the project in Visual Studio by right clicking and selecting “Unload Project”. When the project is unloaded right click it and click on “Edit [Project file name]”
Add the following xml section within the configuration XML of the build configurations.
<ExcludeFoldersFromDeployment>bin</ExcludeFoldersFromDeployment>
<ExcludeFilesFromDeployment>package.config</ExcludeFilesFromDeployment>
When added the Property groups will look like:
<PropertyGroup Condition=" '$(Configuration)|$(Platform)' == 'Debug|AnyCPU' ">
  <DebugSymbols>true</DebugSymbols>
  <DebugType>full</DebugType>
  <Optimize>false</Optimize>
  <OutputPath>bin\</OutputPath>
  <DefineConstants>DEBUG;TRACE</DefineConstants>
  <ErrorReport>prompt</ErrorReport>
  <WarningLevel>4</WarningLevel>
  <ExcludeFoldersFromDeployment>bin</ExcludeFoldersFromDeployment>
  <ExcludeFilesFromDeployment>package.config</ExcludeFilesFromDeployment>
</PropertyGroup>
<PropertyGroup Condition=" '$(Configuration)|$(Platform)' == 'Release|AnyCPU' "
  <DebugType>pdbonly</DebugType>
  <Optimize>true</Optimize>
  <OutputPath>bin\</OutputPath>
  <DefineConstants>TRACE</DefineConstants>
  <ErrorReport>prompt</ErrorReport>
  <WarningLevel>4</WarningLevel>
  <ExcludeFoldersFromDeployment>bin</ExcludeFoldersFromDeployment>
  <ExcludeFilesFromDeployment>package.config</ExcludeFilesFromDeployment>
</PropertyGroup>
Save the changes and reload the project by right clicking the it and selecting “Reload Project”. Commit all the changes you made and queue a new build.
Deploy Azure Function
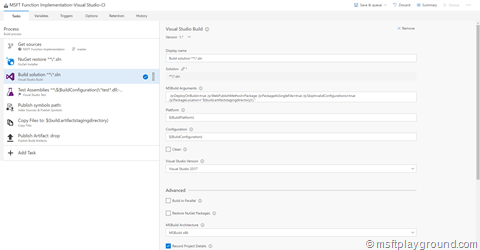
When the build succeed the build template needs to be adjust in order to deploy the Azure Function. Edit the build template and add so called “msbuild” arguments to the build action of the solution to make sure the package is created when the solution is build. In order to achieve this open the Build template editor of your previously created build and click on the “Build solution” action to add the following build arguments.
/p:DeployOnBuild=true /p:WebPublishMethod=Package /p:PackageAsSingleFile=true /p:SkipInvalidConfigurations=true /p:PackageLocation="$(build.artifactstagingdirectory)\\"
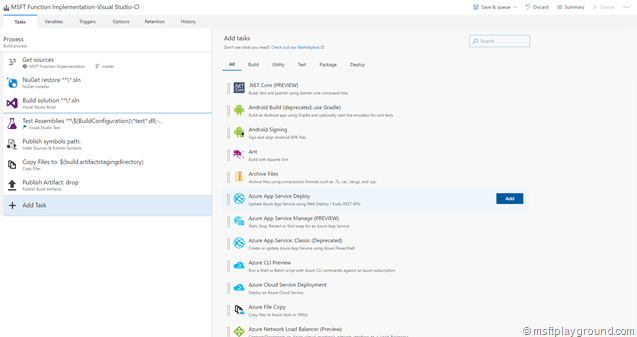
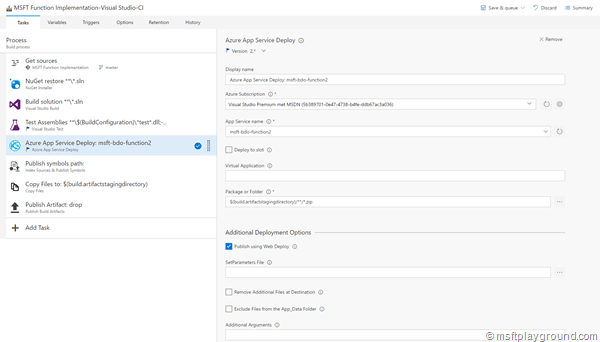
Next up is adding a task to the build template for deploying the resources to Azure. This can be be done by adding the task: Azure App Services Deploy
Configure this build step with the correct subscription, and Azure resource (the function were you would like to deploy to). Make sure you set a different package location, so that the action can find the deployment package created within the previous action:
$(build.artifactstagingdirectory)/**/*.zip
Save and queue a new build. If this build succeeds your pre-compiled Azure Function is deployed to your Azure resource.
Note: This build template requires the Azure Function Host to be present within Azure if there is enough interest I will also create a series of post to deploy the Function by using ARM templates within the same pipeline.
Enable CI
Finally Continuous Integration needs to be enabled. To do this edit the build definition and click on the “Triggers” tab.

![image_thumb[6] image_thumb[6]](/assets/archive/2017/03/image_thumb6_thumb.png)
