Creating the Release Template that runs after the Build – Part 3
With the component created in part 2 we can start using it to deploy applications to our SharePoint environment. We start by creating a new template.
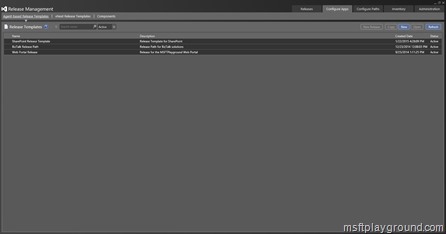
For this post I assume you already created the release paths and have added the SharePoint servers to Release Management. To create a new template open Release Management and click on “Configure Apps” if you have the sub section “Agent-Based Release Templates” open you will see all Release Templates that are used Agent Based. In my demo environment I have three templates for example.
In image you can see the agent based release templates available in my environment:
- SharePoint Release Template, release template for a complete SharePoint release path.
- BizTalk Release Template, release template for a BizTalk release path.
- Web Portal Release, release template for a web portal.
For this section we will start off with a new one by clicking on “New” .
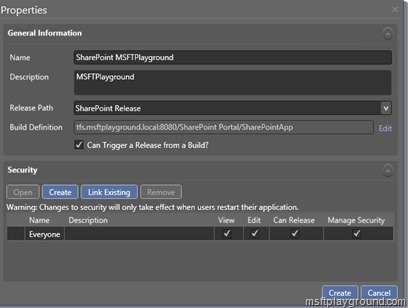
In the window that appears you will have to specify the information.
- Name: The name of the release template.
- Description: The description of the release template.
- Release Path: The release path that is already defined.
- Build Definition: The build that you would like to use. You can specify if the build is able to kick off a release.
- Security: In this section you can specify who or which group is able to do what within this release template. Be careful, by default everyone that has access to release management has edit rights on the release template.
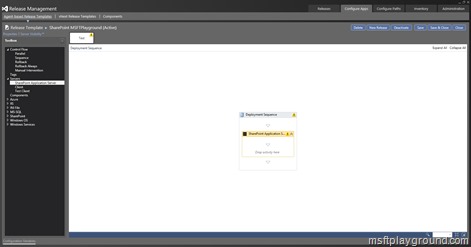
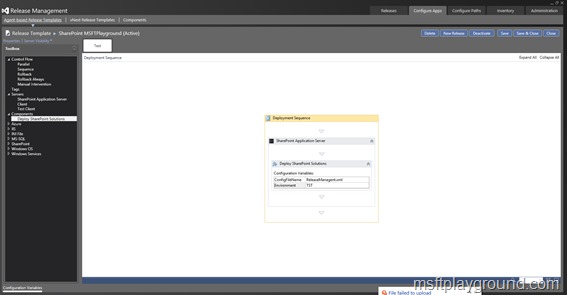
With the properties filled in you will see a kind off workflow interface in which we will be able to specify which steps we need to take during a release in a specific stage. First off all we will drag the right SharePoint Server from the left side within the deployment sequence.
With the correct server in the release template we can specify what needs to be done on that server. We could add our own components but you are also able to use some predefined actions.
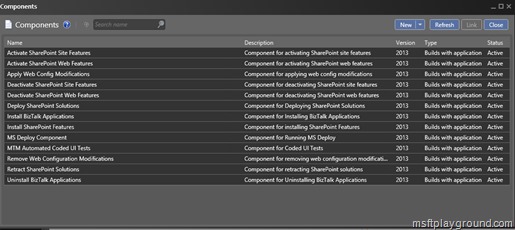
For know we will add our own component. But the component is not available by default. To make it available right click on components and selecting “Add” this will show a list off all available components.
Select the component that we created and click link on the top of the screen. With the component available in the Release Template drag and drop it within the server that we want to perform that action. Next you will need to expand the component in order to fill in the parameters.
With this done you can save the template and kick off a release by using TFS Build. If you change the build definition you can kick off a release by changing the properties in the section called “Release”, by setting “Release Build” to true TFS Build will try to start a release that is attached to that build definition after it successfully build the application.
Using this mechanism explained in the series of posts you are able to structure your SharePoint releases or any other type of release like BizTalk of HTML.By scripting new components (because a SharePoint release does not only exists of deploying solutions) you could also have the complete process of SharePoint deployment.
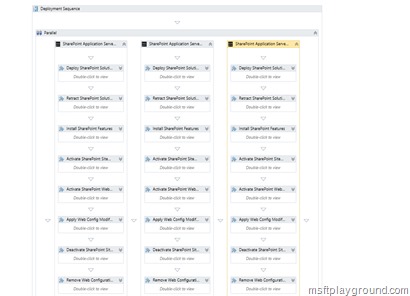
In this deployment sequence you have several components that all take different actions, some examples are:
- Deploy SharePoint Solutions, will deploy solutions based on the drop folder.
- Retract SharePoint Solutions, will retract solutions based on the drop folder.
- Activate Site Features, will activate SharePoint site features.
- WarmUp SharePoint, will warmup SharePoint after a deployment.
If you take it some steps further you could build in a specific role back mechanism that restores your SharePoint environment or deploy to all your development environments in parallel.
I hope you have a good impression of what can be done by using Release Management. If you have any further questions please let me know.

